Creating a new Site in SharePoint is one of those tasks an administrator would want to automate. This task is highly repetitive and can be sensitive to human error. We see a lot of automation in the form of "management scripts" that are stored on the computer of a particular admin. Because this valuable script is most likely to disappear when this admins hard drive crashes or he decides to switch jobs, it makes sense to move this "management script" to the cloud and take the next step into automation.
This blog is the first post in a series of posts about Azure Automation. Also check out: Azure Automation - Part 2: Triggering runbooks and Azure Automation - Part 3: Dynamic scheduling.
Enter Azure Automation.
Azure Automation is great for running scripts in the Cloud. Especially PowerShell, but Python works too. Some amazing benefits of Azure Automation are:- Encryption on variables in the script
- Access to Modules from the PowerShell gallery
- Ease of reusability within other Azure PaaS services (like Logic Apps)
It's pretty straightforward to create an Azure Automation account. You just need to make sure that the subscription has the Microsoft Automation resource provider available.
Automation scripts on Azure are called Runbooks. A Runbook can be a PowerShell or Python script but can also be a PowerShell Workflow or Graphical PowerShell Workflow. In our case we choose a regular PowerShell Runbook. This video demonstrate how to create your first Runbook.
In our example, our script is using cmd-lets from the PnP PowerShell module for SharePoint Online. Now let's add this Module to our Automation Account so it can be used in our Runbooks.
Our starting point is set. Now let's take it to the next level.
Security first.
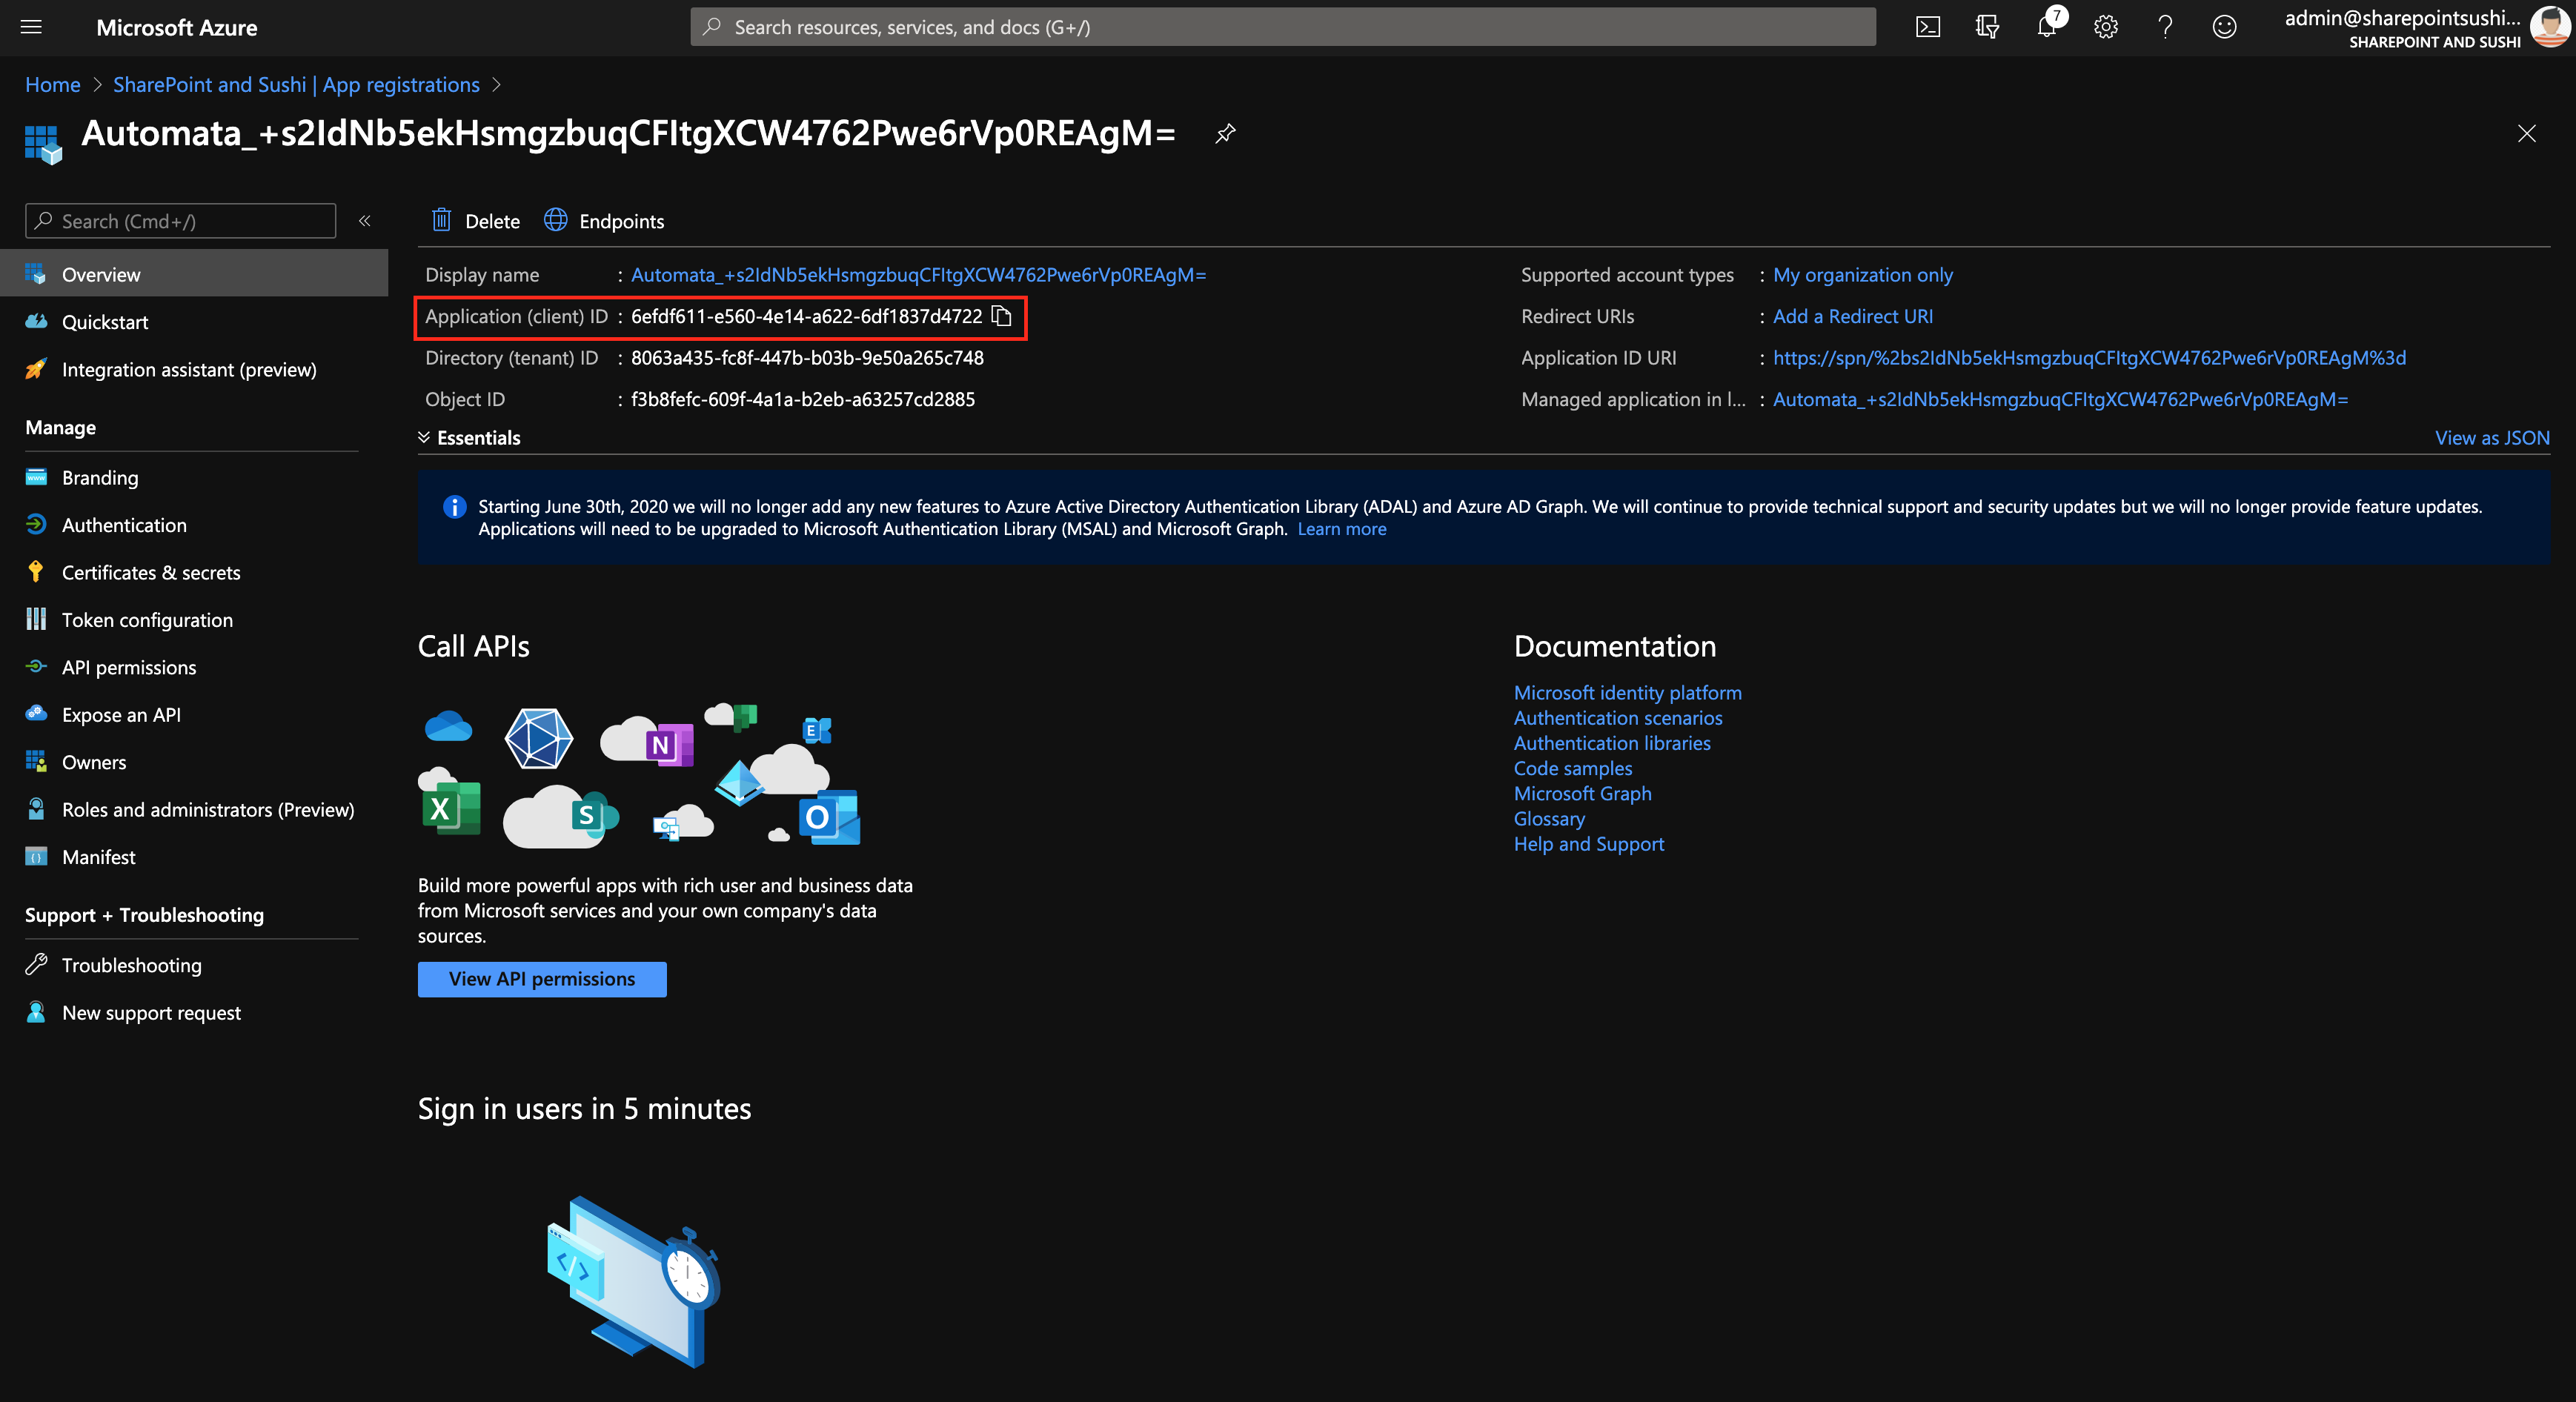
The task we want to automate in this scenario, is a task that is done by an administrator with permissions on the highest level (Tenant). Since we don't want scripts to just be able to act as an administrator on Tenant level, we need to make sure our Runbook is registered as an application in Azure AD and give it the correct permissions. Fortunately, every Automation Account is registered in Azure AD as application with the name of that automation account + a hash. All we have to do is create a specific Client Secret and add API permissions to the registration. Check the next video to see how.
Make sure to copy the Secret somewhere safe for the time being since Azure AD only displays it once during creation.
Variables.
The Client Secret is a valuable token for everyone who wants to access to SharePoint with Administrator privileges. Therefor it's important to store this token in a safe way that still enables your script to access it when connecting to SharePoint. Usually we store secrets like this in Azure KeyVault, but Azure Automation has its own solution for storing secrets as well. We can use encrypted variables!
Variables in Azure Automation are shared resources. That means that every Runbook in your Automation Account has access to variables that are defined. On top of this we can mark a variable as encrypted. That way the value of the variables can't be read back. It can however be used in Runbook itself and will only be decrypted at runtime.
FYI: It's also possible to store credentials in an Automation Account for scenarios that don't support Application Registrations.
Now we also need to store the Application ID as a variable in the Automation Account. No need to make that encrypted. With both the ID and the Secret we can make a connection to SharePoint with Administrator privileges.
SharePoint registration.
The final piece of puzzle is that we need to tell SharePoint that our application (Runbook) is authorized to perform its tasks. Create a TeamSite in our case. Therefor we have to register this application to SharePoint with Full Control on tenant level. We use the following URL for that: https://[YOURTENANT] -admin.sharepoint.com/_layouts/15/appinv.aspx
Put in the application ID we have found in the previous step and hit Lookup. Confirm that the correct information is displayed and then paste in this piece of XML to grant Full Control on tenant level.
<AppPermissionRequests AllowAppOnlyPolicy="true">
<AppPermissionRequest Scope="http://sharepoint/content/tenant"
Right="FullControl" />
</AppPermissionRequests>
You can only perform this action as a tenant-level administrator. When you hit create, you have to give consent to trust this application.
Time to code!
Don't let the word "code" scare you. We are going to use just a couple of lines to create a new SharePoint site using our Runbook. Here they are:
$clientId = “”;
$clientSecret = “”;
$teamSiteUrl = "https://[YOURTENANT].sharepoint.com/sites/MyFirstRunbookSite";
Connect-PnPOnline -Url "https://[YOURTENANT].sharepoint.com/" - ClientId $clientId - ClientSecret $clientSecret;
New-PnPSite - Type CommunicationSite - Title "My first Runbook Site" -Url $teamSiteUrl - Lcid 1033 -Wait;
Disconnect-PnPOnline;
In case this is the first time you see PowerShell code, the $ sign indicates a variable so the first 3 lines assing values to those 3 variables. Then next 3 lines are commands. We use 3 cmd-lets from the PnP PowerShell package we imported earlier. The first and third statement handle the connection with SharePoint and the second cmd-let actually creates the site. Don't forget to fill in the correct URL by replacing [YOURTENANT].
You may have noticed that the first two variables ($appld & $appSecret) are assigned with an empty value. We replace the values with the variables we defined in our automation account.
Testing Runbooks.
In the Azure portal we don't exactly have a full blown IDE to develop and test these Runbooks. There is however a Test pane available so you can test Runbooks by running them and see basic logging. The test pane can run your scripts without messing with the published Runbook. When the test is succesful you can publish your Runbook to "production". When you mess up , there is always this handy button to revert your code to the published version so you can easily start over. 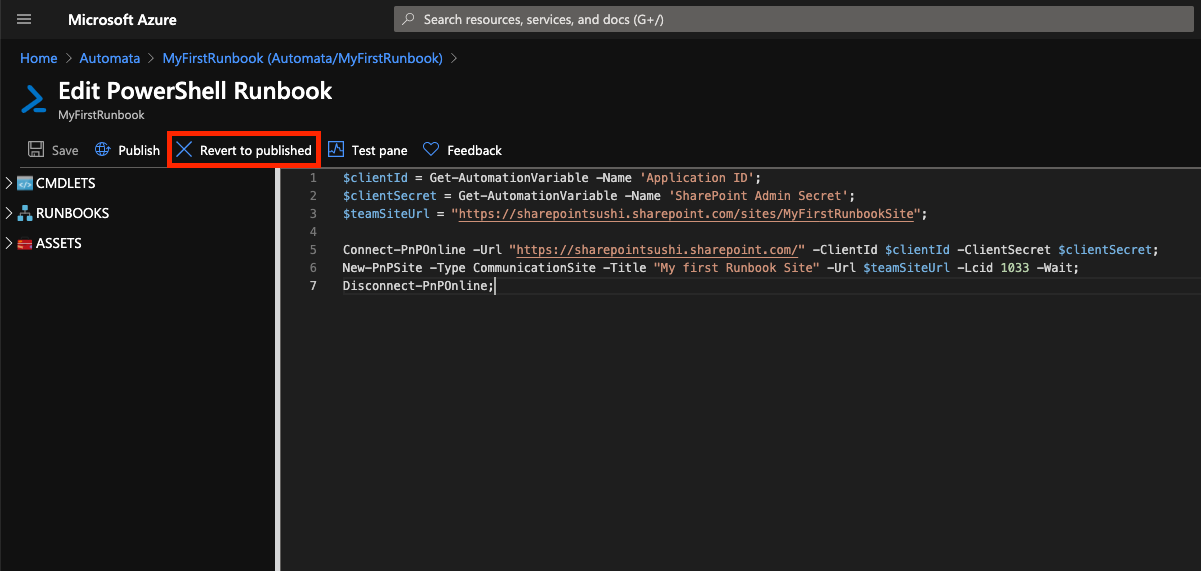
Next steps to full Automation.
So what's next? At this point we have our management script running in the Cloud but we still need to trigger it manually. In our case we don't want to schedule this Runbook, because creating a SharePoint site is an event driven action. Based on some event somewhere we need a new SharePoint site. This event can be a new entry in a Line of Business application or maybe even a SharePoint list where users can request a new SharePoint site.
In the next post we will show you how to trigger a Runbook based on an event. Stay tuned!
Nieuws.
Portiva gaat verder met Rapid Circle. Binnenkort organiseren wij onze webinars dan ook onder de naam Rapid Circle. Lees meer over ons en Rapid Circle in het nieuwsbericht.