With the SPFx framework you can make really cool web parts and extensions for SharePoint. In this blog I want to show you a little trick that can help develop your solutions. An easy way to set up an App settings file in your solution.
We came up with this solution when we were developing our last project that included a solution with 4 web parts. These web parts had a few variables that were used across all four. There were some configuration settings as well like an API address and API ID. Especially configurations are annoying, because every time you switch between development environment and production you need to switch those configurations. The lazy developer that I am I would like to do that with the least bit of effort and not change these configurations at a gazilion places throughout my solution.
This idea was basically copied from the way the SPFx framework and generator uses language files. When you generate a new SPFx project with the Microsoft generator. In your web part folder you get a folder ‘loc’ with two files: ‘en-us.js’ and ‘mystrings.d.ts’. These files define certain localized values of variables. If you add more language files besides the en-us one that is provided you get multi-lingual support for your solution.
In these files you can create a module with a set of variables. In your webparts you can import the module that is exported. The variables from the module can then be used as a typed instance throughout your solution and then values are inserted.
We are going to use this setup to create an appSettings file for our solution. In your webparts folder create a file called: appSettings.js with content like this:
   define([],


   function


   () {


   return


    {


   "


   StringValue


   "


   :


   "


   The answer to life the universe and everything:


   "


   ,


   "


   NumberValue


   "


   :


   42


   ,


   "


   BooleanValue


   "


   :


   true


 }
 });
And then an AppSettings.d.ts file next to it with this content:
   declare interface IAppSettings {
 StringValue: string;
 NumberValue: number;
 BooleanValue:


   boolean


   ;
 }  declare module 'AppSettings' {
 const appSettings: IAppSettings;
 export = appSettings;
 }
Then we have to add a reference to this file in the config.json(found at the top level in the folder ‘config’) file with the localized resources. There should already be a reference to the language file in the localized resources, just add your appSettings file there:
   "


   localizedResources


   "


   : {


   "


   AppSettingsBlogWebPartStrings


   "


   :


   "


   lib/webparts/appSettingsBlog/loc/{locale}.js


   "


   ,


   "


   AppSettings


   "


   :


   "


   lib/webparts/appSettings.js


   "


 }
If you have given your appSettings a different name or placed it in a different position, adjust accordingly. (tip: just run gulp serve on your project and look for it in the lib folder if you are not sure how to reference it)
Then the final step is to import the module wherever you want to use it. You can import it anywhere with the follow statement:
   import


   *


    as appSettings from


   '


   AppSettings


   '


   ;
The module is then available for that class or component, including typings. You can always add more variables by adding them to the file and they will become available. My main component now looked this:
   import


   *


    as React from


   '


   react


   '


   ;  import * as appSettings from 'AppSettings';
 import styles from './AppSettingsBlog.module.scss';
 import { IAppSettingsBlogProps } from './IAppSettingsBlogProps';  export default class AppSettingsBlog extends React.Component<IAppSettingsBlogProps, {}> {
 public render(): React.ReactElement<IAppSettingsBlogProps> {
 return (
 <div className={ styles.appSettingsBlog }>
 <div className={ styles.container }>
 <div className={ styles.row }>
 <div>
 <p>String value: {appSettings.StringValue}</p>
  <p>Number value: {appSettings.NumberValue}</p>
  <p>Boolean value: {appSettings.BooleanValue}</p>
  </div>
  </div>
  </div>
  </div>
  );
 }
 }
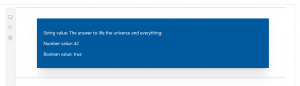
The result looks this: