
Imagine you want to create a portal with information about certain products and product related documents. This sounds a lot like a product catalog, however you want to create this portal in SharePoint Online where the product catalog functionality is not available.
Now you have a challenge.
You also want to make this easy to create for the people that are supposed to maintain this portal.
Another challenge.
Let’s sketch the scenario.
You want a portal where you can create pages with information about certain unique products. On this portal you also have related documents that correspond with your products. (Documents like fact-sheets or sales presentations)
It would be nice that certain information is automatically matched to your product page like those documents.
It would also be nice that all your products can be managed in one place and that your products are shown with an image.
Note! Each product has its own unique name and this name will be used as the common identifier between the different elements you would need
- Product in the Image library
- Page with the same title as the product in the Image library
- Related document in a Document library with a look-up column to the product in the Image library
Let’s have a look at what you would need
| Bare minimum of elements you would need | |
| One | a SharePoint Online environment to place your product portal |
| Two | knowledge about SharePoint Designer 2013 where you edit your Page Layouts |
| Three | knowledge about SharePoint Search Schema’s to configure managed properties |
| Four | an Image library for your products and additional metadata for your product information |
| Five | a Document library for your related product documents |
| Six | a Page library where you create your product pages |
For this article I will only explain on how to edit your Page Layouts for as the other elements are SharePoint Online “normal” features.
So which steps do you need to create your predefined “Content Search” webpart?
Step 1: Create and configure your search webpart (Content Search) on a dummy page the way you want it to be.
Step 2: Configure your query based on the page title which has to be a unique title
You can implement this by using the following code: ”refinablestring106={Page.Title}”. In my case I have matched refinablestring106 to a field named Vessel (this is the “product”).
Step 3: Export your webpart and save the code
Step 4: Open SharePoint Designer 2013
Step 5: Create a copy from the page layout you want to use and give it your own name
Step 6: insert a SharePoint webpart à Content Search in your own page layout on the place where you want your predefined search webpart. Insert this between the “ZoneTemplate-tags”
Step 7: Open your exported webpart in an editor (like NotePad++ of TextPad)
Step 8: Make sure your properties are easy to read in your editor and in SharePoint Designer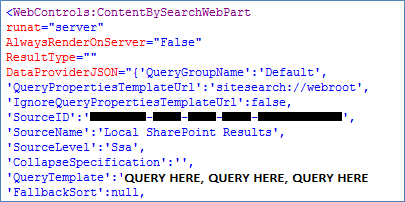
Step 9: Copy the following related properties from your editor to your webpart in SharePoint Designer.
The properties below are like the bare minimum that makes sense. You can edit more properties depending on how your exported webpart has been configured.
| Property | subproperty | Copy below values from your editor to SharePoint Designer |
| DataProviderJSON | SourceID | This is your sitecollection ID |
| SourceName | Local SharePoint Results | |
| SourceLevel | Ssa | |
| QueryTemplate | This is your query you build earlier | |
| ResultsPerPage | Copy from your editor to SharePoint Designer | |
| ItemTemplateID | "~sitecollection/_catalogs/masterpage/Display Templates/Content Web Parts/Item_TwoLines.js" | |
| GroupTemplateID | "~sitecollection/_catalogs/masterpage/Display Templates/Content Web Parts/Group_Content.js" | |
| RenderTemplateID | "~sitecollection/_catalogs/masterpage/Display Templates/Content Web Parts/Control_ListWithPaging.js" | |
| SelectedPropertiesJson | Properties mapped in the webpart | |
| HitHighlightedPropertiesJson | Properties mapped in the webpart | |
| Title | Title of the webpart | |
| ChromeType | Use this value if you want to show the webpart title | |
Step 10: Save your page layout and it is ready to use
You have now created your own page layout with a predefined search component which you can select from the Page Layout menu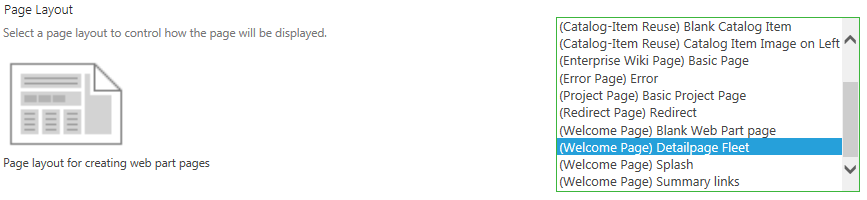
You can repeat these steps to add multiple content search components and as with search component you can create your own display templates with them to show information in a different way. Use the “ItemTemplateID” property to match your display templates.
Below is an example of only predefined content search webparts and 3 different ways of showing information using display templates.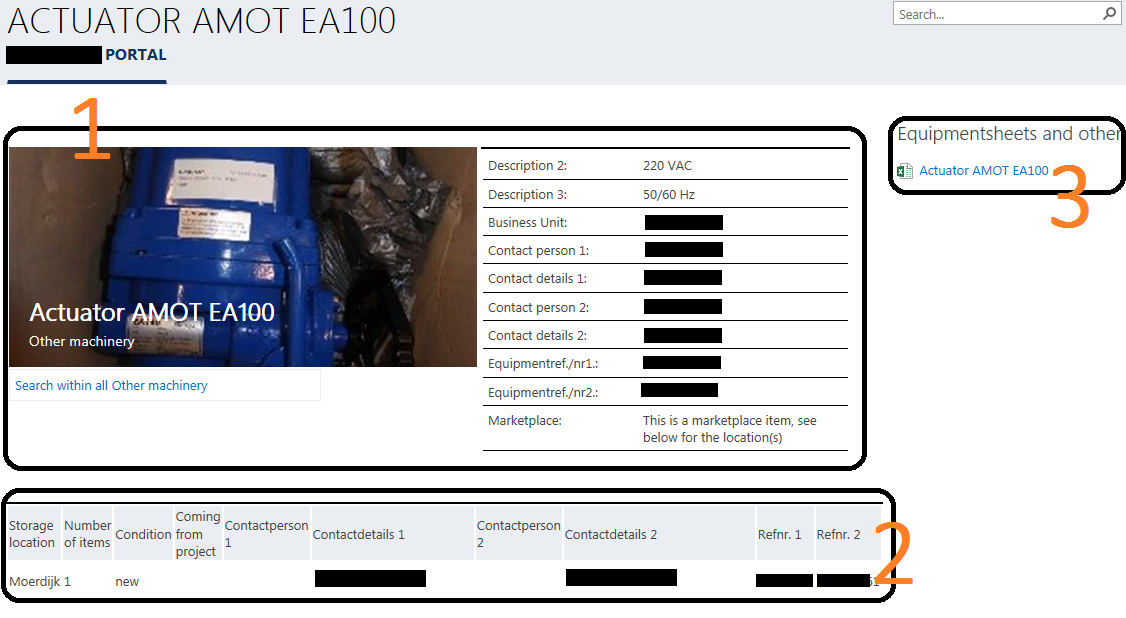
Take note! Because you are using the content search webpart, your results are limited to a maximum of 50 results.
You have set up an easy way for the people who must create new product pages so that they don’t have to configure a content search webparts for each product and your product are maintainable from one list.
Remark:
When you have saved the page layout and you want to edit your webpart (because you want a different title or a different number of results) the code has been changed a little bit by SharePoint Designer. It has been changed in: “<spsswc:ContentBySearchWebPart”
Make sure that your search webpart starts with the code: “<WebControls:ContentBySearchWebPart”
Or it will not work correct and will give errors when creating new pages with the page layout.

