
Did you know you can create folders inside a SharePoint list (not a library)? And that you can then create items inside that folder?
No? Don’t worry, I also didn’t know about this up until recently. And now you know about this as well!
In this blog, I will explain why you may want to do this and – more importantly – how you can do this, both manually and by using Power Automate.
Why would you create items inside folders?
The first time I noticed this functionality, I was wondering why you would use this. After all, if you want to group items, you can simply use metadata, right?!
But quickly after that, I realized you can use this for granting unique permissions on a set of items instead of granting unique permissions to each single item. Because if you grant unique permissions on the folder, all items within that folder will automatically inherit those permissions as well.
This way, you can probably bypass the unique permissions limit of 50.000 uniquely permissioned items.
There could be other benefits as well for putting items inside a folder, so please share with me if you happen to know one.
How to create items inside folders?
Now that you know why you may want to use folders, you probably want to know how to do that. I will explain two ways: manually and automatically with Power Automate.
Manually
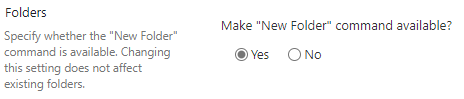
Creating folders inside a list isn’t really that hard. You just need to enable folder creation and you’re good to go!
You can do so by going to List settings > Advanced settings and enable the Make “New Folder” command available? option:
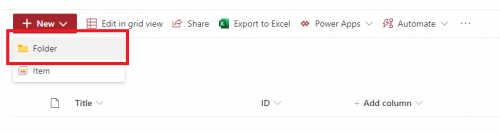
You now have to option to create new folders inside your list:
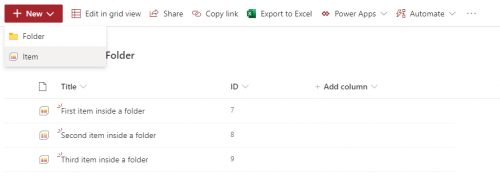
When your folder is created, you can add items to that folder:
Automatically
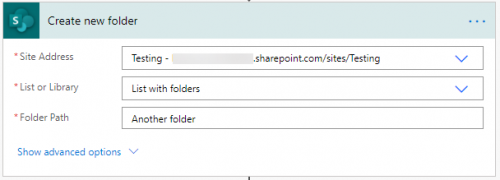
You can either manually create a folder after enabling the Make “New Folder” command available? option or do it automatically using the Create new folder action in Power Automate:
When using Power Automate, you don’t need to set the Make “New Folder” command available? option to Yes.
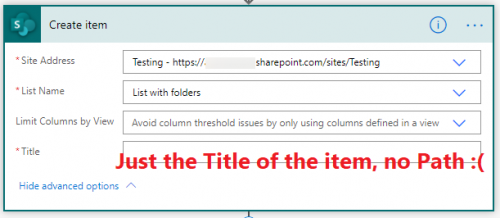
With the folder created, you can now proceed by automatically creating items inside that folder. Unfortunately, the Create item action does not allow you to provide any type of Path configuration, so this action will always create the item at top level.
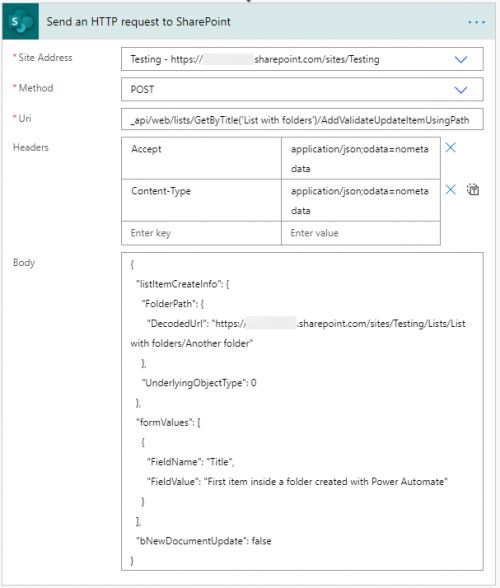
Luckily, like any other SharePoint action that hasn’t got its own action inside Power Automate, you can use the Send an HTTP request to SharePoint action to achieve this.
The method for doing so is the AddValidateUpdateItemUsingPath method. For this, you will need to following information:
- List name, which is the display name of the list (not the internal name as used in the URL)
- Decoded URL of the created folder, which is the URL to the folder without any special characters (like %20 for a space character)
- Name of the item
The uri to call is:
_api/web/lists/GetByTitle('')/AddValidateUpdateItemUsingPath
The Headers you need are:
Accept: application/json;odata=nometadata
Content-Type: application/json;odata=nometadata
The body of the call is as follows:
{
"listItemCreateInfo": {
"FolderPath": {
"DecodedUrl": ""
},
"UnderlyingObjectType": 0
},
"formValues": [
{
"FieldName": "Title",
"FieldValue": ""
}
],
"bNewDocumentUpdate": false
}
If you put this together inside your Send an HTTP request to SharePoint action, it should like something like this:
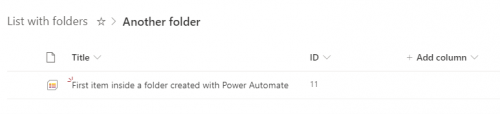
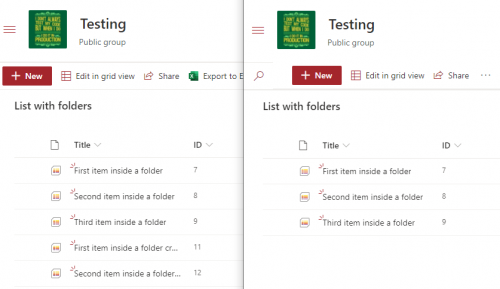
After running the flow, a new item has been created inside the Another folder folder:
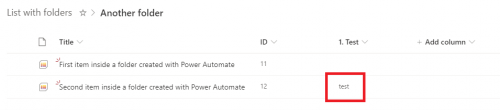
If you need to fill more metadata, simply add them inside the formValues array. Make sure you set the FieldName value to the internal name of your field:
"formValues": [
{
"FieldName": "Title",
"FieldValue": "Second item inside a folder created with Power Automate"
},
{
"FieldName": "_x0031__x002e_Test",
"FieldValue": "test"
}
],
Permissions
As said before, you can grant unique permissions to a folder. That way, all underlying items will inherit those permissions automatically and there is no need to set each item individually.
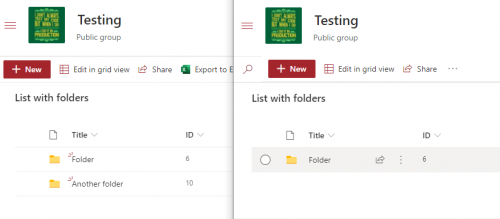
In the below example, I granted the user on the left permissions on both folders and the user on the right only on the Folder folder:
Flattening folders
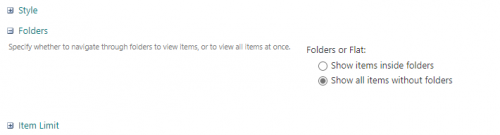
To prove that the user on the right also doesn’t have access to the items inside the Another folder folder, I configure my view to flatten the entire list so that all items will be shown (without folders) by setting the Folder or Flat option inside your (classic) view editor to Show all items without folders:
When you compare both users again, you will see that the items inside the Another folder folder are not shown for the user on the right:
This also brings back the ‘classic’ feel of the list so that users don’t need to browse across folders.
Source: https://www.about365.nl/2020/10/16/create-sharepoint-items-in-a-folder-using-power-automate/


