
This is part 3 of the Custom Actionable Messages with Microsoft Flow series
A few months ago, I wrote about Custom Actionable Messages with Microsoft Flow in a two part blog series. There have been some changes regarding Actionable Messages and some new insights I have gained that I want to inform you about.
Action Card deprecated
First of all, the Action Card I referred to in my posts is now deprecated. You can still use them, but they are not supported anymore. I recommend you use Adaptive Cards from now on. More information can be found at this Dev Center article. The main changes are as follows:
- The JSON for an Adaptive Card is different from an Action Card. The differences are:
- "$schema": "https://adaptivecards.io/schemas/adaptive-card.json" has been added.
- "version": "1.0" has been added.
- "@type": "MessageCard" has been changed to "type": "AdaptiveCard".
The MessageCard Playground is updated to V2 to use the Adaptive Card format, but you can also use the new Adaptive Cards Designer which provides more intuitive design options. I recommend using the new Adaptive Cards Designer
- The <script> tag that is used in the HTML body of your email has been changed from <script type="application/ld+json"> to <script type="application/adaptivecard+json">.
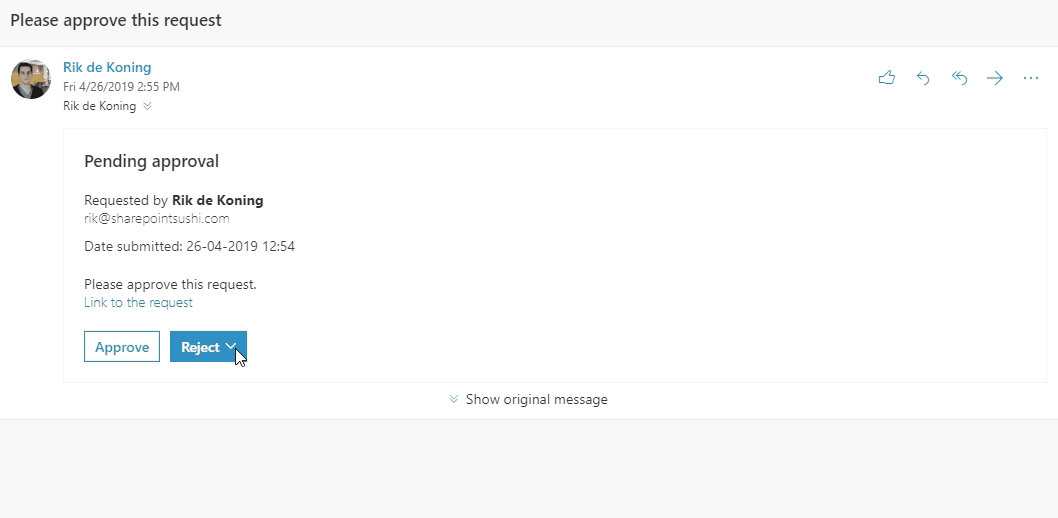
Example
The HTML body (including JSON and Dynamic Content) I used will generate the email below:
More information on composing your HTML can be found in Part 1 of this blog series.
Refresh Adaptive Card
Another thing I've learned is that you can update your Adaptive Card after the user has completed the assigned task using the Refresh cards mechanism. The Microsoft documentation isn't quite accurate on this, but thanks to Stefan Strube I've figured it out.
There are a few steps involved to get this working:
1. Register your Actionable Message in the Actionable Email Developer Dashboard:
- Click on + New Provider to add a new provider to the dashboard
- On the next page, enter a Name for your Actionable Message
- Enter the Sender email address from which the message will originate
- Enter the Target URL, which is the Flow HTTP Endpoint of your 'When an HTTP request is received' trigger
- Select the Scope of submission (for this blog I used the My Mailbox option)
- Add a logo (optional)
- Accept the terms and conditions and click Save
2. Add the value from the Provider Id (originator) field to the originator attribute in your JSON, as follows:
"originator": "ProviderId",
3. Generate a new Adaptive Card using the Adaptive Cards Designer (or just update your existing Adaptive Card) that must be shown after a user has completed the assigned task. Don't forget to add the originator attribute here as well.
4. Add the JSON to your second Flow that processes the outcome of the request. Please note that you don't need to wrap your JSON inside an HTML <script> tag. If you do wrap your JSON inside a <script> tag, your Flow will fail!
5. Add a Response action (from the Request connector), set the Status Code to 200, add the following Header: CARD-UPDATE-IN-BODY: true and add you JSON to the Body of the action.
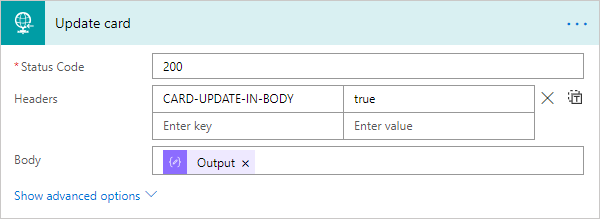
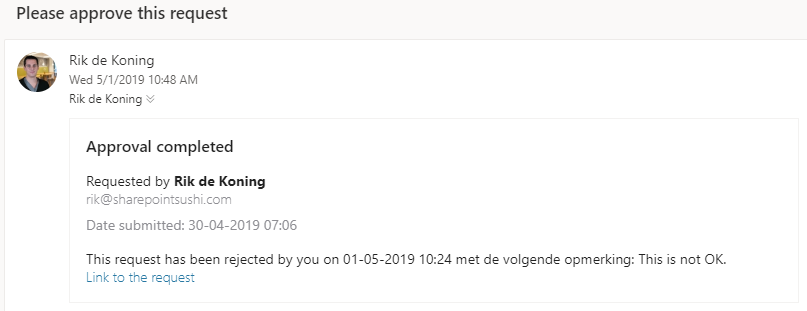
That should do it, now when the user completed the assigned task, the Adaptive Card will be updated:
Required output
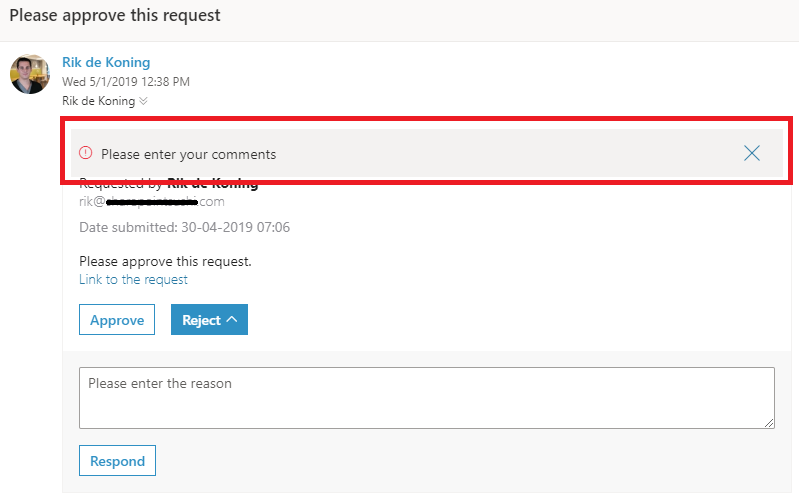
With Action Cards, you could set the isRequired property on a textbox to true to make it required. Unfortunately, in the current version of Adaptive Cards it's not possible to make a textbox required. Luckily, with the same mechanism as you refresh your Adaptive Card, you can make your textboxes required.
First of all, you must add a Condition into your Flow that checks if the regarding textbox is empty with the following expression:
empty(triggerBody()?'comments' is equal to true
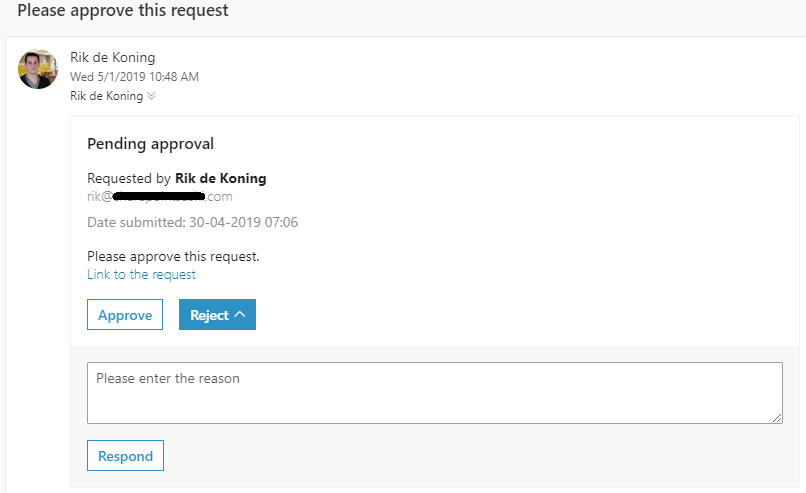
I also added the check if the outcome is Rejected, because I only have a textbox when Rejected has been selected.
If the condition is met, your Flow should respond to your Adaptive Card using the Response action again. Only this time, the Status code shouldn't be 200 since that is the OK code. I use the 406 code which is Not acceptable. You should also add the following Header: CARD-ACTION-STATUS: <your error text>. After the Response action, you must add a Terminate action to make sure your Flow doesn't run any further.
That should do it. When the user doesn't fill in the required text box, an error message will appear:
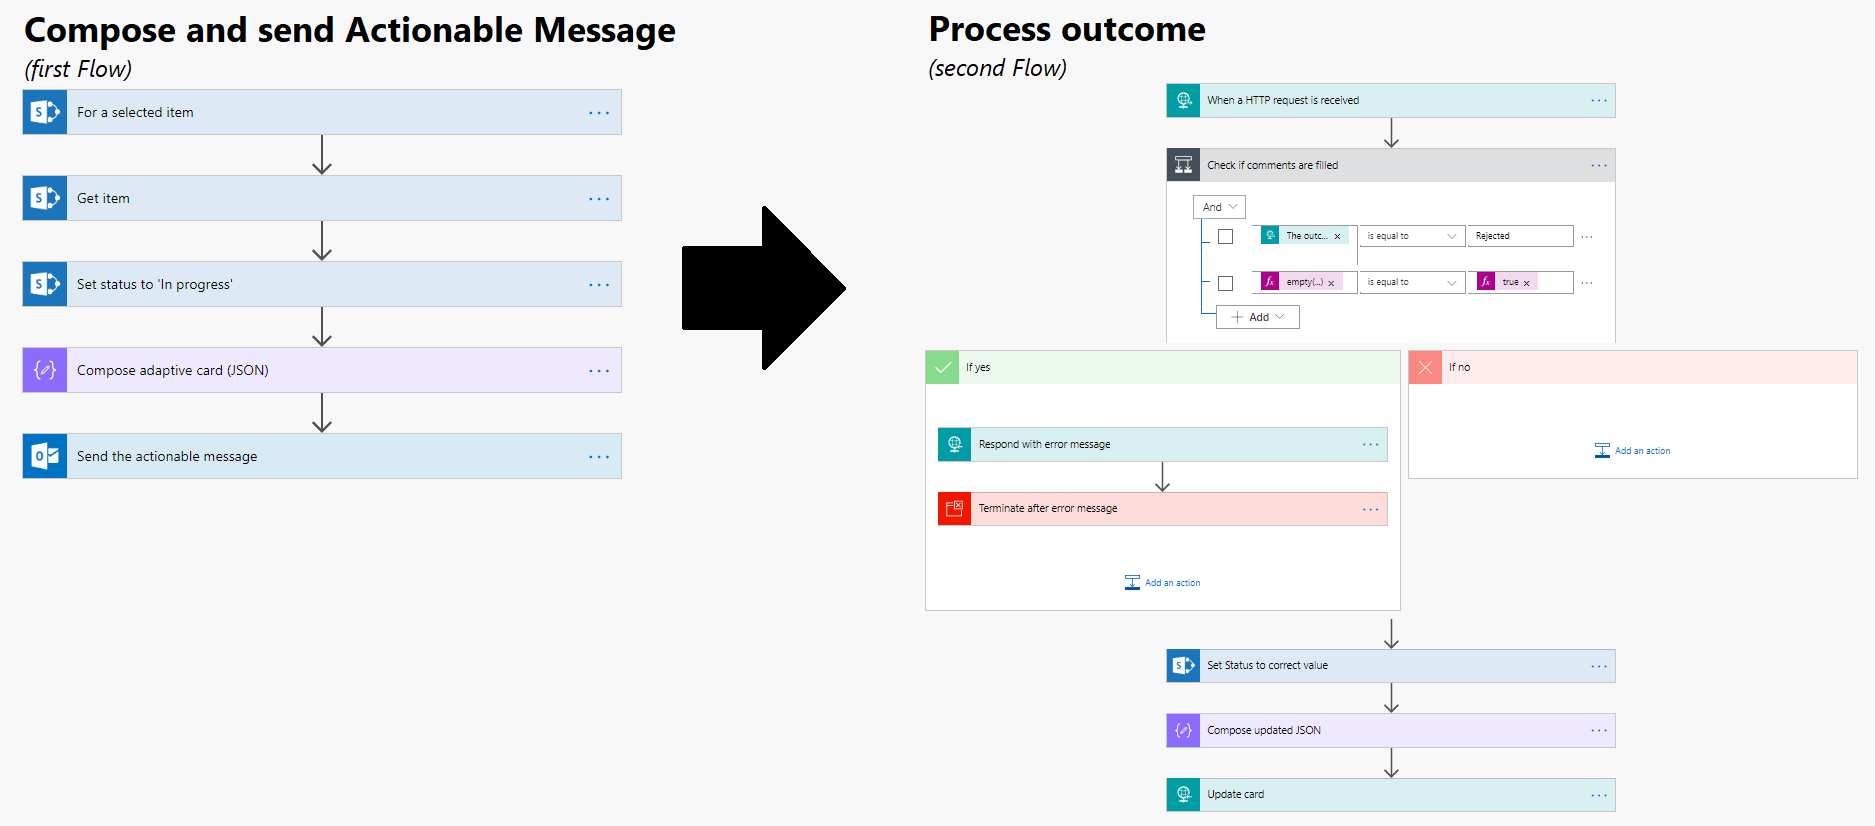
The entire Flow 'chain' is as follows:
Source: https://www.about365.nl/2019/05/01/custom-actionable-messages-with-microsoft-flow-update/


