I am a fan of using lookup columns in SharePoint, because I only have to define something once instead of filling in the same information multiple times in various locations. It's also very easy to incorporate this into your PowerApp. But if you take it to the next level and you want a lookup column to depend on another lookup column and create some sort of a conditional lookup column, you may have some struggles to configure this into your PowerApp.
In this blog, I will explain how to achieve this.
In this blog, I will use an example of a SharePoint list: New students (onboarding), where new students are added. In this list, the following information will be stored:
Student name is a simple Single line of text field. Faculty and School are lookup columns to the following lists:
The data model of this solution is as follows:
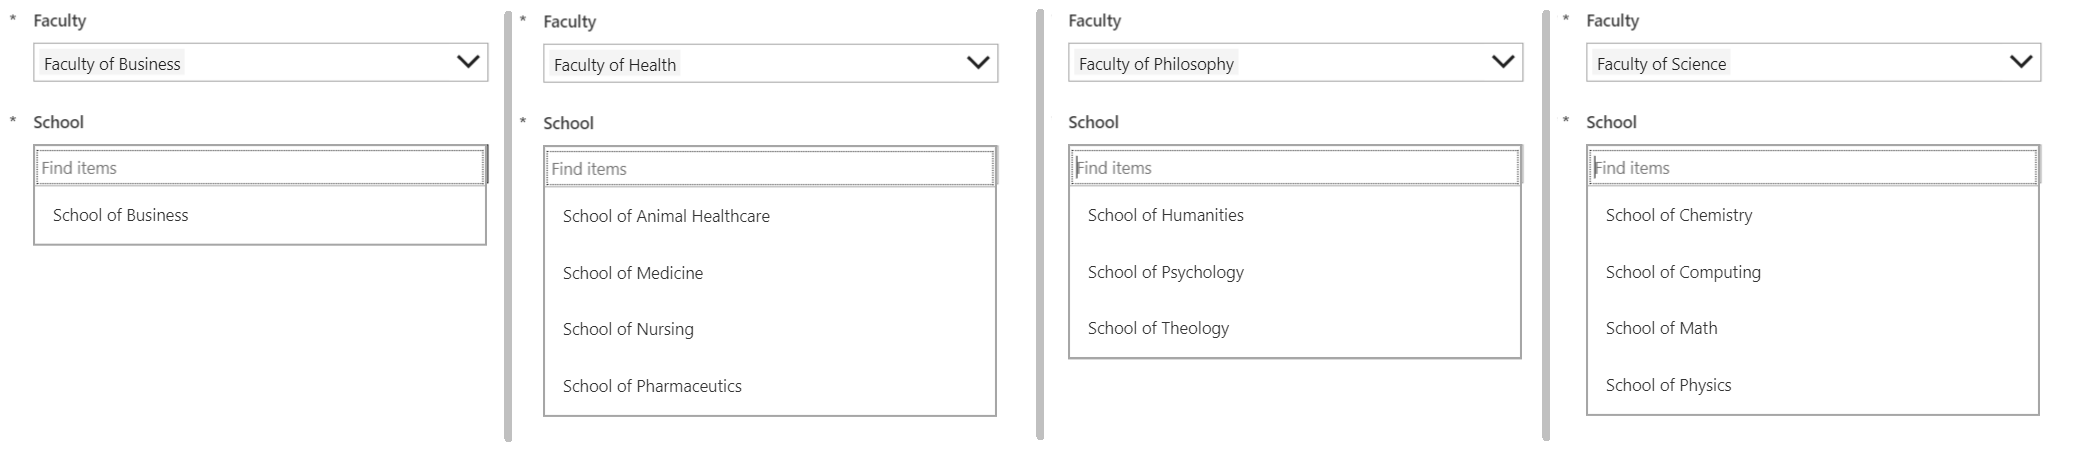
I added some test data into the Faculties and Schools list so that I could test with this data:
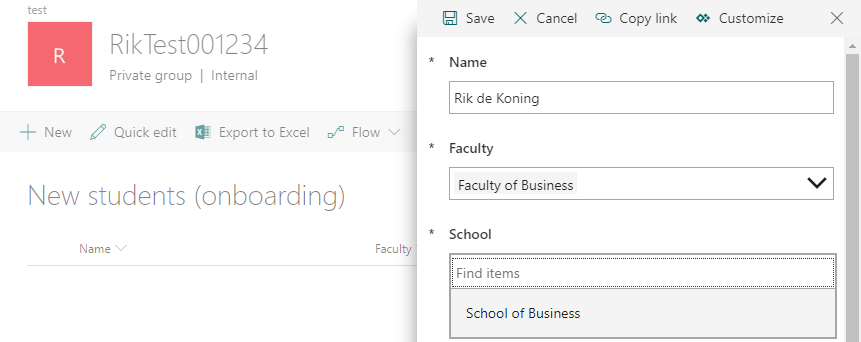
When I want to add an item in the New students (onboarding) list, I can select the Faculty of Business and the School of Medicine. This is not what I want, because that faculty and school don't match together. For Faculty of Business, only the School of Business should be available in the dropdown box.
To make sure you can only select the schools that are related to a specific faculty, you must use PowerApps to modify the behavior of your lookup column.
To do this, click on the Customize forms options from the Command bar of your New students (onboarding) list. This will trigger PowerApps and create a default form for you.
We only want schools to appear that are related to the selected faculty. Unfortunately we cannot filter values directly into the Schools lookup fields, because the choices in this field are based on the following expression:
<code><span style="color: #3366ff;">Choices</span>(<span style="color: #339966;">'New students (onboarding)'</span>.School)</code>
These only contain the Value and the ID of the selected school. This dropdown has no knowledge of any Faculties.
The easiest way to make filtering possible is to write all schools that are related to the selected school into a collection and filter the School lookup column based on the values into that collection. The steps we need to perform:
Before we can get all related schools for a selected faculty, we need to add the Schools list to our PowerApp. This can be done by going to the View tab and selecting Data sources. A window will appear on the right site where you can click + Add data source. Select the SharePoint connection. Your site should show up beneath 'Recent sites' if you have recently used this site within PowerApps. If not, you can manually enter the Site URL and click Go. Select the Schools list and click Connect. The data source is now added to your PowerApp.
When a faculty is selected, we need to get all related schools from our Schools list and write them into a collection. For this, we need to configure the OnChange event of the Faculty field. Because we want to overwrite all existing data into the collection, we need to use the ClearCollect() function. The expression we need to use is:
ClearCollect(
    collSchools,
    {
        Schools: Filter(
            Schools,
            Faculty.Value = DataCardValue2.Selected.Value
        )
    }
)
| Property | Explanation |
|---|---|
| collSchools | This is our collection where all related schools for the selected faculty are written in to |
| Schools | This is the name of the column where the data is written in to |
| Filter | This is the function that filters values from a data set. The format of this function is as follows: Filter(source,logical_test) |
| Schools | This is the data set that we use in our filter. In this case, it is the Schools list we added as data source |
| Faculty.Value | This is the value we are looking for in our data set. In this case, it is the Faculty lookup field in our Schools list |
| DataCardValue2.Selected.Value | This is the selected faculty from our PowerApp |
After adding this function, we can check if it works by entering the Preview mode (by pressing F5), selecting a Faculty and closing the Preview mode. If we view the collection by clicking on the View tab and selecting Collections and clicking on the table icon in our Schools column of our collSchools collection, you can see that only the schools that are related to our selected faculty are filled.
Please note that only the first 5 items inside the collection are shown.
Now that we have something that we can compare our School choices to, we can proceed by filtering our School lookup field. We need to configure the Items property of the Schools lookup field by using the Filter() action. Before we can do that, we need to Unlock the specific card by selecting the Department card and clicking on Unlock to change properties within the Advanced tab.
After that, we can fill in our expression within the Items property, which is:
    Filter(
    Choices('New students (onboarding)'.School),
    Value in First(collSchools).Schools.Title
)
| Property | Explanation |
|---|---|
| Choices('New students (onboarding)'.Department) | This is the data set we want to filter, which are the original choices from the lookup field. You can copy this entry from the original Items property |
| Value | This is the value we want to filter, which are the original values from the lookup field as stated in the row above |
| in | This is the comparison parameter. Since we are comparing to a collection, which contains multiple items, we cannot use the = parameter. |
| First | With this expression, you only take the first item from your collection. We only have 1 item in our collection so this is what we need |
| collSchools | This is the collection that we only want the First item from |
| Schools | This is the column that we want to from our first item |
| Title | This is the field we want. If you look at the ClearCollect section of this blog, you can see that there is a Title field in the collection which contains the School |
If all steps have been configured correctly, we can now select only the Schools that are related to the selected faculty.
One thing that still isn't exactly what I want is the following:
After you select a school and change the faculty, the school will remain selected even though the school is not related to the faculty you selected.
You can easily fix this by clearing the input from the School field when changing the Faculty field by adding the following expression to the OnChange() property of your Faculty field:
<code><span style="color: #3366ff;">Reset</span>(<span style="text-decoration: underline; color: #993366;"><em>DataCardValue3</em></span>)</code>
Where DataCardValue3 is the Schools lookup field in your PowerApp. After that, the Schools lookup field will be cleared after you change the faculty:
You should have the following expression within the OnChange property of your Faculty lookup field:
    ClearCollect(
    collSchools,
    {
        Schools: Filter(
            Schools,
            Unit.Value = DataCardValue2.Selected.Value
        )
    }
);
Reset(DataCardValue3)
and the following expression within the Items property of your Schools lookup field:
    Filter(
    Choices('New students (onboarding)'.Department),
    Value in First(collSchools).Schools.Title
)
If you save and publish your PowerApp, you can try this within your SharePoint list and see that it works:
Source: https://www.about365.nl/2018/08/24/creating-conditional-lookup-columns-in-sharepoint-with-powerapps/