
Microsoft recently announced their new Power Platform DLP (Data Loss Prevention) capabilities. This blogpost will guide you through these new capabilities. Please note that these changes are currently in public preview so it’s not GA yet.
New wizard
First of all, a whole new wizard for assigning DLP policies has been introduced.
Old wizard
Remember the old wizard where things were very unclear and user unfriendly?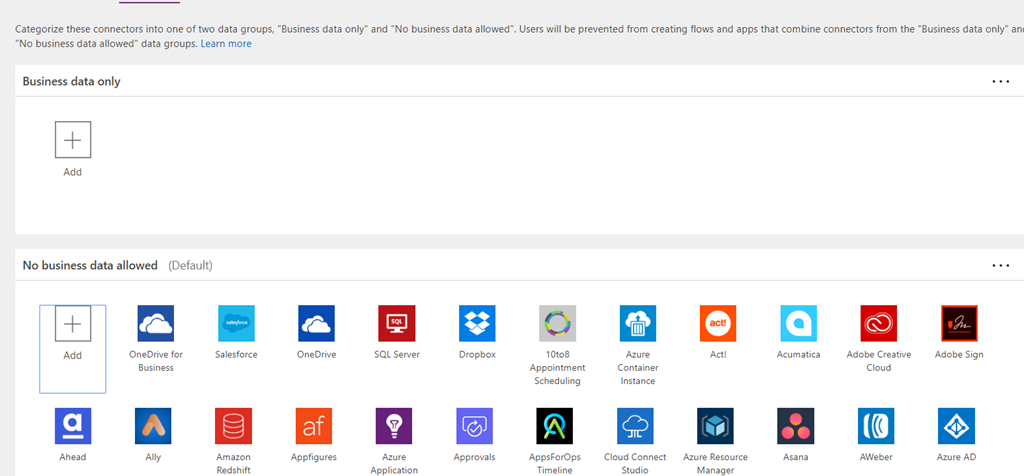
Within this old wizard, you were able to switch connectors between the following data groups:
- Business data only
- No business data allowed
The basic principle was that connectors in the Business data only data group couldn’t be used with the connectors in the No business data allowed data group.
New wizard
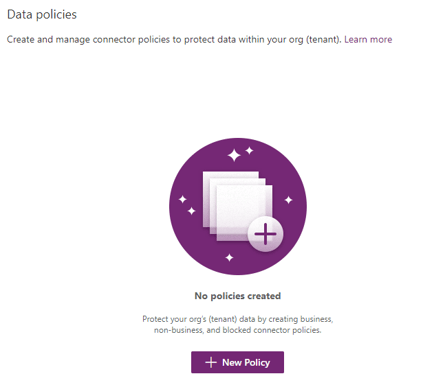
The new wizard is more user friendly gives you a better understanding of the policies. To get to the new wizard, go to the Power Platform Admin Center (https://admin.powerplatform.microsoft.com) and select Data policies (preview).

This will guide you to the new Data policies section where you can create your data policies using the brand new wizard.
To create a new policy, click on + New Policy and follow the steps.
- Give your policy a name
- Assign connectors to one of the following data groups: Business, Non-business, Blocked (more on this later)
- Select the environments the policy applies on
- Review your policy
- Create policy
Data groups
We know the data groups Business and Non-business from the old wizard. These are still intended for the same use, but have a clearer description. Blocked is a whole new data group.
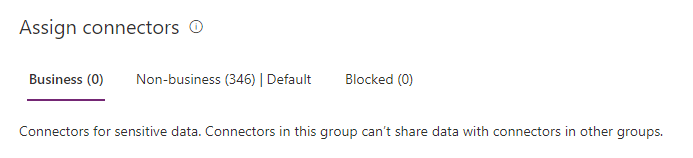
Business
According to the wizard, the Business data group is intended for connectors that use sensitive data and cannot share data with connectors from the Non-business data group:
Non-business
According to the wizard, the Non-business data group is intended for (how suprising) connectors that use non-sensitive data and cannot share data with connectors from the Business data group.
If you haven’t configured your policy yet, all connectors will show up in the Non-business data group by default:

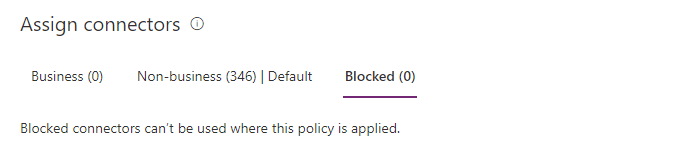
Blocked
This is a new data group that allows you to block the entire connector from using in your environment(s):
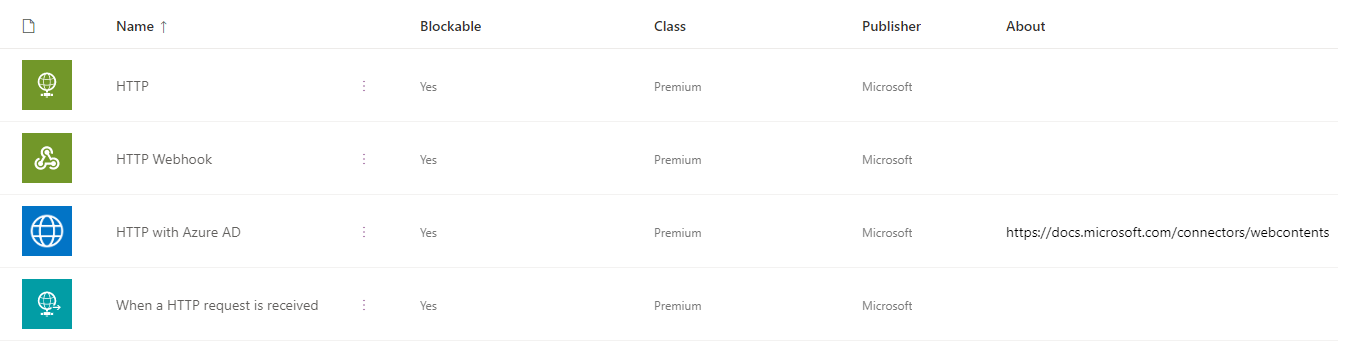
HTTP parity
It is now also possible to assign HTTP connectors to one of your data groups:
Example
To show you how this new wizard and its new data group work, I’ll show you an example. Let’s say we have SharePoint and OneDrive for Business as our primary business data storage provider and we don’t want data from that locations to be moved/copied/… to Dropbox or send by mail using Gmail. To avoid smart users bypassing the policy using some sort of HTTP request, we want to block this as well.
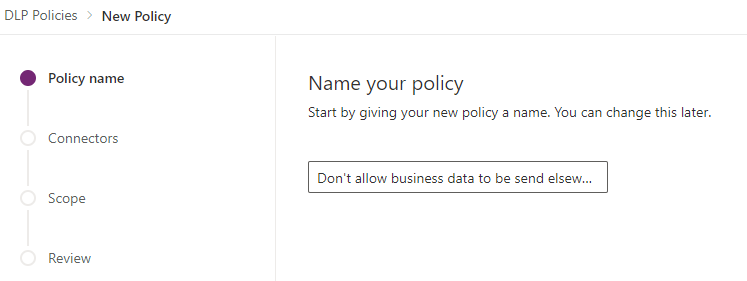
Policy name
First, we need to create a new policy; let’s give it a simple name: ‘Don’t allow business data to be send elsewhere:
Assigning connectors to data groups
After that, we need to identify the SharePoint and OneDrive for Business connectors as Business data. As said before; when you haven’t configured any policies yet, all connectors are configured as Non-business data so we need to move the SharePoint and OneDrive connectors to the Business data group by selecting the connector and clicking the Move to business button on top.
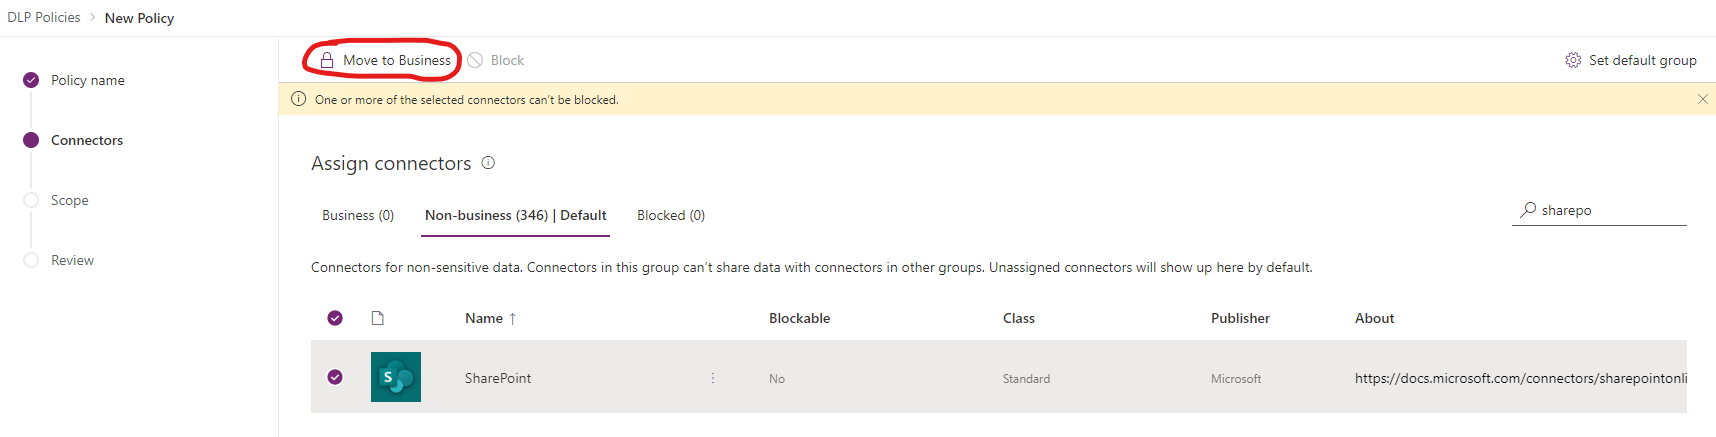
Please note the highlighted text saying you cannot move this connector to the Blocked data group. That’s because the default Office 365 connectors can’t be blocked.
Also, note the Set default group button on the top right. This allows you to set the default group to another data group. This may come in handy if you want to majority of your connectors into another data group than the Non-business data group.
Blocking connectors
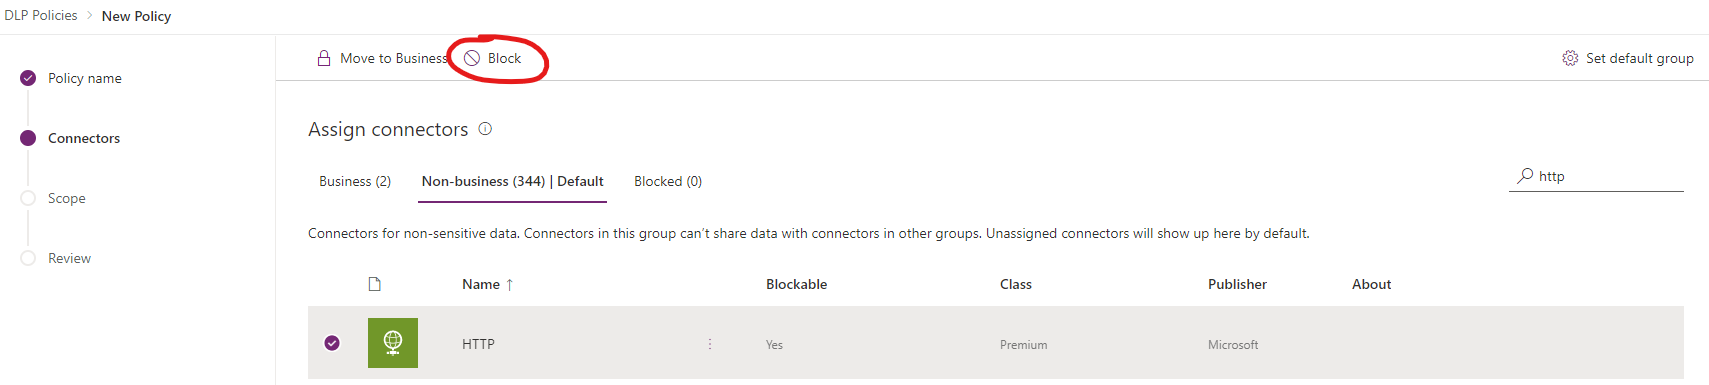
After moving the SharePoint and OneDrive for Business connectors to the Business data group, we need to make sure HTTP requests are blocked. To do this, simply select the HTTP connector and click on Block.
Selecting environments
We’ve now configured our policy. Click Next to select the environments you want this policy to apply to:

- All environments: this will apply the policy to all of your environments.
- Multiple environments: this will apply the policy only to the environment(s) that you select on the next page.
- Exclude certain environments: this will apply the policy to all of your environments, except for the environment(s) that you select on the next page.
For this demo, I will assign the policy to all of my environments.
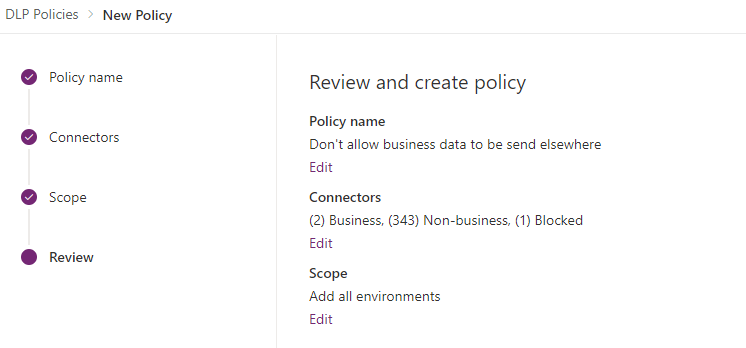
Review your policy
Clicking Next will guide you to the section where you can review your policy. You can edit your policy from this page by clicking Edit on any of the sections.
Create your policy
If you’re satisfied with your policy, click Create policy and your policy will be applied to the selected environment(s).
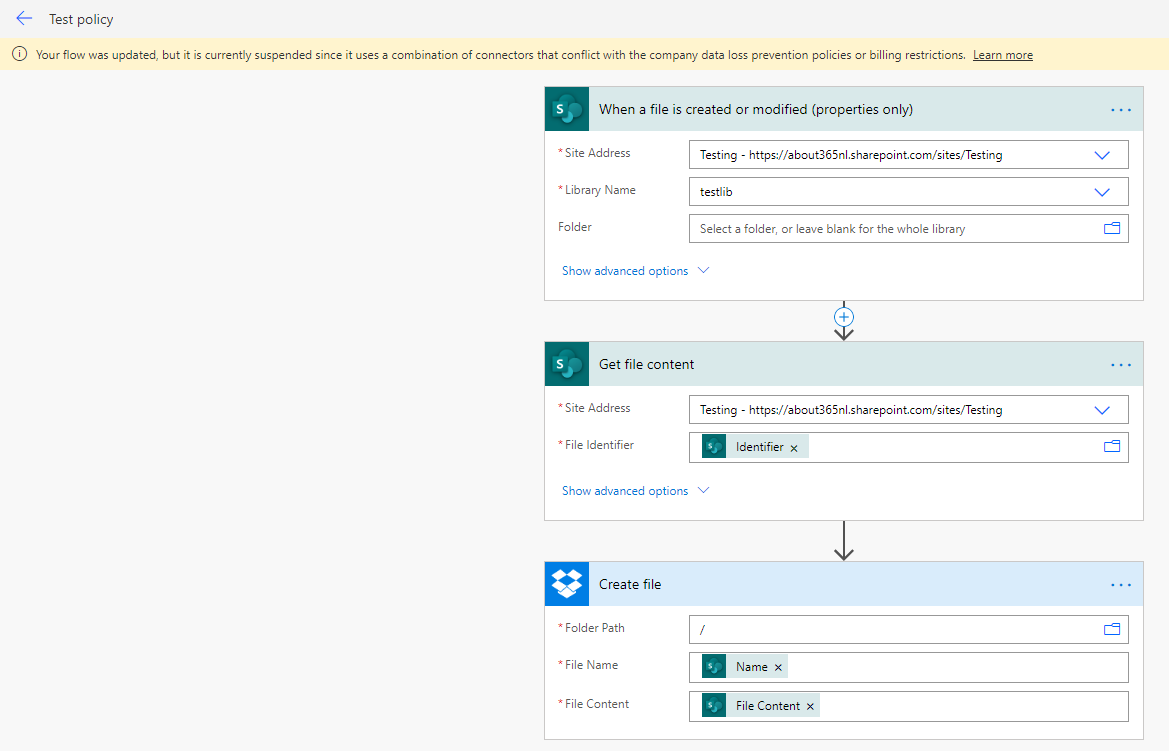
Testing your policy
When I create a new flow that creates a new file into my Dropbox after a file is created in SharePoint and save it, the flow will tell me that the flow is saved but cannot be enabled due to policy restrictions:
Final words
This was a quick run through the new DLP policy capabilities. Please note that when you configure a policy like this example, you won’t be able to use any connector next to SharePoint and OneDrive for Business inside the Power Platform (e.g. sending mails from Outlook for Office 365 with document information in it).
So you need to think carefully about what you want to configure exactly. A possible way to start is to set the default data group to the Business data group and move from there on out. This makes it easier to rule out certain connectors without having to configure a lot of rules.


